Alright, so you're staring at that old linoleum or the cracked tile in your bathroom and thinking, 'Time for a change.' Good for you! New flooring or tile can totally transform a space. But before you dive in, let's talk about what's involved, what you can realistically do yourself, and when it's just smarter to call someone like us at Irvine Bathroom Construction.
Before You Start: The Prep Work
This is where a lot of folks get tripped up, and it's also where you can save some serious money if you're willing to put in the elbow grease. Good prep is probably 70% of a successful flooring job.
- Demo Day: Ripping out old carpet, laminate, or even existing tile? That's usually something a homeowner can handle. You'll need a pry bar, a hammer, maybe a floor scraper, and definitely some heavy-duty trash bags or a dumpster. Just be careful with dust, especially if you're dealing with older materials that might contain asbestos (unlikely in newer Irvine homes, but always good to check if it's really old stuff).
- Subfloor Inspection: Once the old stuff is gone, you've got to look at what's underneath. Is it solid? Is it level? If you've got a bouncy subfloor, or significant dips and humps, your new flooring won't last. For tile, especially, a perfectly flat, stable surface is non-negotiable. If it's just a few minor bumps, you might be able to use a self-leveling compound. But if it's a major structural issue, that's a pro job, no question.
- Moisture Check: This is huge, especially for us here in Orange County. We don't get a ton of rain, but humidity can still be an issue, and if you're on a slab foundation, moisture can wick up. You can buy a cheap moisture meter. If it's reading high, you've got to address that before laying anything down, or you're looking at mold, cupping, or adhesive failure down the road.
Choosing Your Material: What's DIY-Friendly?
Not all flooring is created equal when it comes to a DIY installation.
- Luxury Vinyl Plank (LVP) or Laminate: These are probably the most DIY-friendly options out there. Many are click-lock systems, meaning you don't need messy glues or mortars. You'll need a good utility knife, a tapping block, and maybe a jigsaw for cuts. If you're tackling a smaller room, say a guest bathroom or a spare bedroom, this is definitely doable for an experienced DIYer.
- Engineered Hardwood (Floating): Similar to LVP, some engineered hardwoods can be floated (not glued or nailed down). This is a step up in difficulty from LVP, as the material is more delicate and cuts need to be precise.
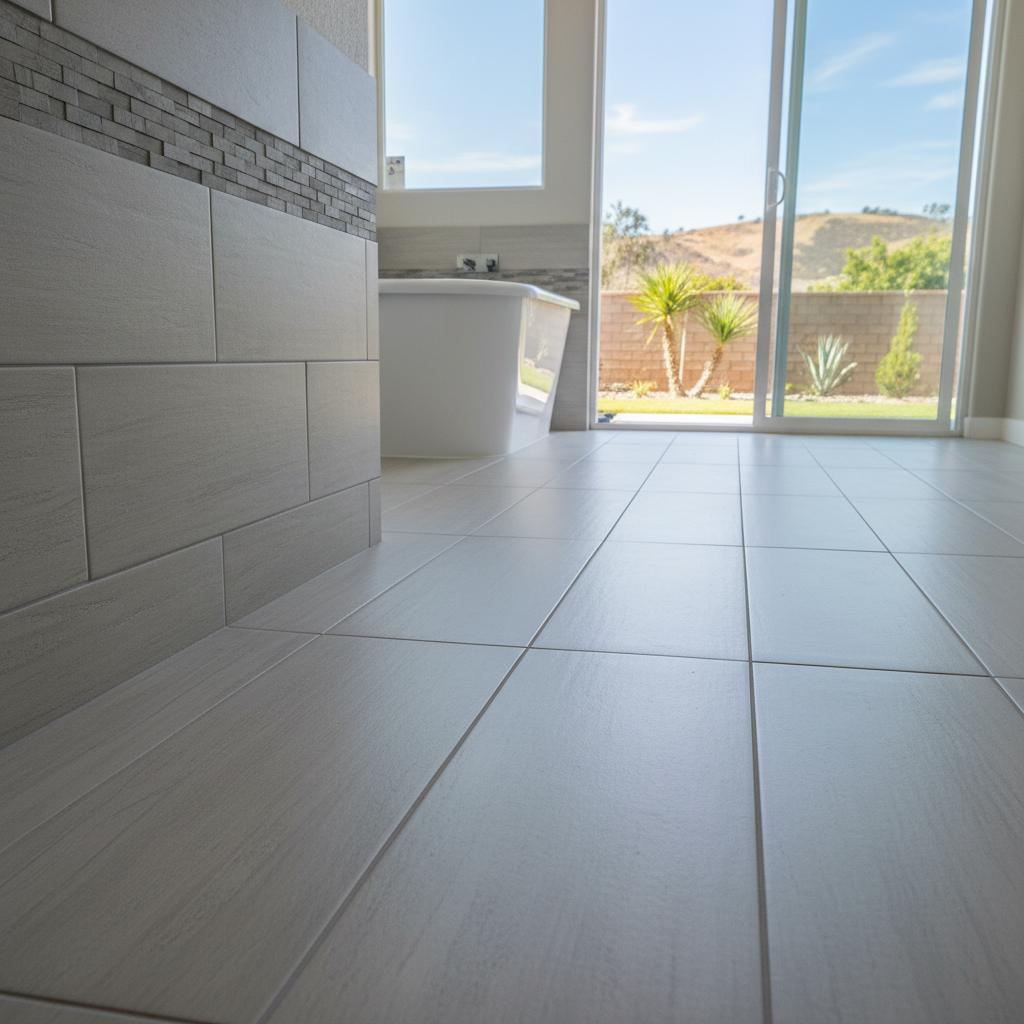
- Ceramic or Porcelain Tile: This is where things get serious. Laying tile isn't just about sticking it down; it's about proper thin-set application, consistent grout lines, dealing with corners, slopes for drains, and making accurate cuts, especially around toilets or shower curbs. Getting it wrong means uneven tiles, cracking grout, or worse, water penetration. If you're doing a small backsplash, maybe. But a whole bathroom floor, or a shower? That's typically a job for someone who does it every day.
- Natural Stone Tile (Marble, Travertine, etc.): Even harder than ceramic. These materials are often softer, requiring special cutting blades, and can be more prone to breaking. Plus, they need sealing. Definitely a pro-level job.
- Solid Hardwood (Nail Down or Glue Down): This requires specialized tools like a flooring nailer or specific adhesives, and a lot of expertise to get it right. Not a DIY project for 99% of homeowners.
During the Project: The Nitty-Gritty
Let's say you've decided to go for it with LVP in your kitchen. Here's what you need to remember:
- Read the Instructions: Every product is different. Don't assume you know how to install it just because you've watched a YouTube video. The manufacturer's instructions are your bible.
- Take Your Time: Rushing leads to mistakes. Measure twice, cut once. Lay out your pattern beforehand.
- Acclimation: For many materials, especially LVP and wood products, you need to let them sit in the room for a few days before installation. This lets them adjust to the room's temperature and humidity, preventing issues like gapping or buckling later.
- Tools Matter: You don't need to buy every fancy tool, but having the right basic tools makes a huge difference. A good quality tape measure, a reliable utility knife, a speed square, and knee pads are essential.
After the Install: Finishing Touches & Maintenance
You've done it! The new floor looks great. Now what?
- Clean Up: Get rid of all the debris, dust, and stray bits of material.
- Grout & Seal (for Tile): If you did tile, grouting is the final step. Take your time, wipe away excess grout properly, and then make sure to seal it once it's cured, especially in wet areas like a shower. This is critical for preventing water damage and staining.
- Trim & Transitions: You'll likely need to install baseboards, shoe molding, or transition strips between different flooring types. These finish the look and hide any expansion gaps.
- Proper Care: Understand how to clean and maintain your new flooring. Different materials have different needs. Harsh chemicals can ruin finishes.
When to Call a Pro (Like Us)
Look, I'm all for homeowners tackling projects they're comfortable with. It saves money and gives you a sense of accomplishment. But there are times when calling a professional is just the smarter move. If you're feeling overwhelmed, if the subfloor is a mess, if you're dealing with complex tile patterns, or if it's a high-traffic area like your main entryway or a shower that absolutely cannot leak, that's when you call us at Irvine Bathroom Construction. We've seen it all, from the beautiful homes in Turtle Rock to the newer developments near the Great Park, and we know how to get it done right the first time. We've got the tools, the experience, and the know-how to handle the tough stuff, ensuring your investment lasts.
Don't be afraid to ask for help or even just get a quote. Sometimes, the peace of mind is worth every penny.